Sunday, November 27, 2011

Mocha Morning Card Keeper

Card Keeper and 5 Card Class
Tomorrow night my ladies will be making a Card Keeper and 5 Cards to place inside.  What a great present this would make.
Mocha Morning Card Keeper    
I covered the Stampin' Card Keeper (from page 35 of the Holiday Mini Catalog) lid with Mocha Morning Specialty Paper.  The flowers were made with the Fun Flower die.  I placed a Fleur de lis knob in the center so that I can give this to a special person in my life.
The Card Keeper comes with six dividers for the important occasions for giving cards.  In class we will be making five cards.  Since my ladies chose to use the Paisley Petals DSP for their Card Keeper lids, I made the five cards to match.
Paisley Petals Thanks
Recipe
Stamp: Tagtastic (Hostess)
Ink: Versamark
Paper:  Paisley Petals DSP, Naturals White, Pumpkin Pie Card Stock
Accessories:  Baja Breeze 1/2" Seam Binding Ribbon, 1 3/4" Circle Punch, 1 3/4" Scallop Circle Punch, Tangerine Tango Emboss Powder, Heat Tool

Paisley Petals Birthday

Recipe
Stamp: Happiest Birthday Wishes (Hostess)
Ink: Versamark, Early Espresso
Paper:  Paisley Petals DSP, Naturals White, River Rock and Chocolate Chip Card Stock
Accessories:  Chocolate Chip 1/2" Scallop Dot Ribbon, 1" Circle Punch, 1 3/4" Scallop Circle Punch, White Emboss Powder, Heat Tool

Paisley Petals Get Well
Recipe
Stamp: Word Play
Ink: Lucky Limeade
Paper:  Paisley Petals DSP, Naturals White and River Rock Card Stock
Accessories:  Retired Ribbon, Decorative Label Punch
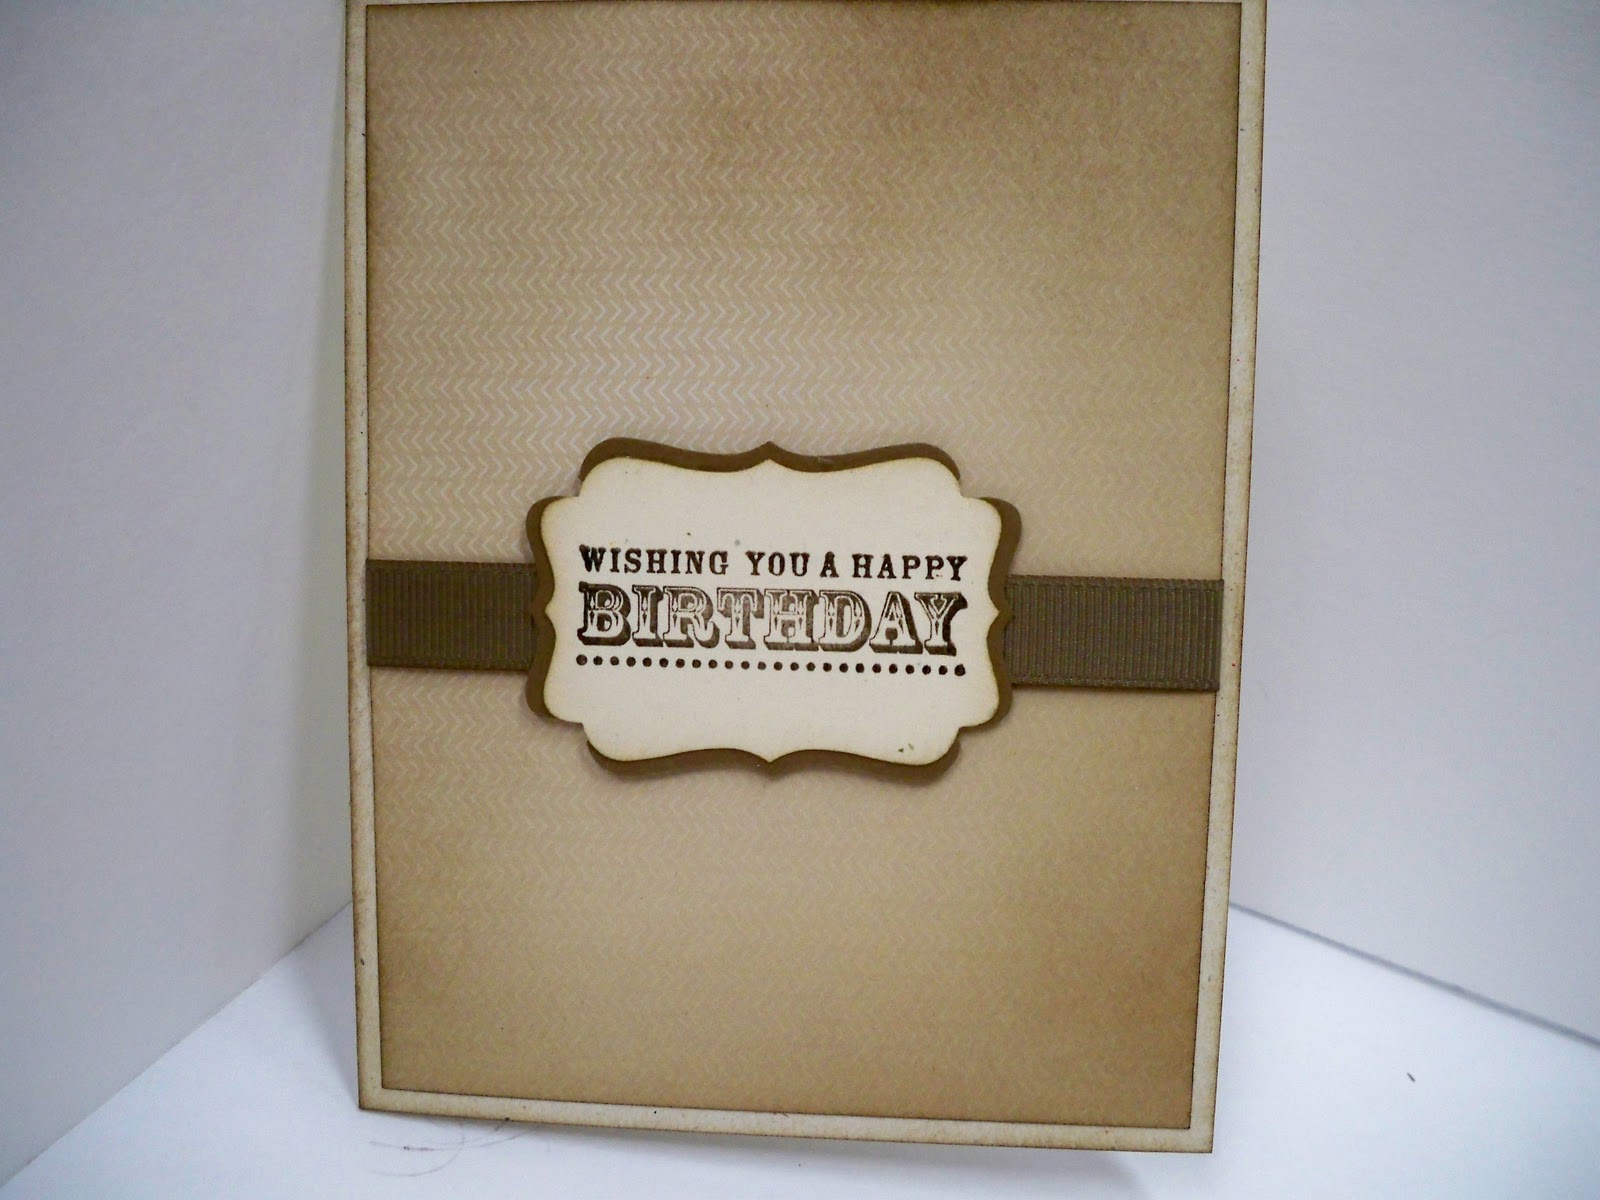
Paisley Petals Male Birthday
Recipe
Stamp: Happiest Birthday Wishes (Hostess)
Ink: Early Espresso
Paper:  Paisley Petals DSP, Naturals White, and Soft Suede Card Stock
Accessories: Retired Ribbon, Decorative Label Punch

Paisley Petals You Are Loved
Recipe
Stamp: You Are Loved
Ink: Lucky Limeade
Paper:  Paisley Petals DSP, Naturals White Card Stock
Accessories: Retired Ribbon, Decorative Label Punch, Basic Pearls, Permanent Ink Marker


Sunday, November 20, 2011

It's Good to be the Hostess


Dates: November 1-December 15, 2011
Details
Hostesses will receive an additional $35 in free Stampin' Up! products when they hold a workshop totaling $350 or more (excluding tax and shipping)! This is in addition to all the other benefits they already get as a Stampin' Up! hostess.
If your hostess' workshop sales total is
Your hostess earns hostess dollars

It's Good to Be the Hostess
Total Free Stampin' Up! Merchandise
Plus, hostesses earn full-priced items at 50% off
$350
$50
+
$35
$85
---
$400
$65
+
$35
$100
1 item
$500
$80
+
$35
$115
2 items
$750
$120
+
$35
$155
3 items
$1,000+
$160 plus 15% of amount over $1,000
+
$35
$195 plus 15% of amount over $1,000
4 items
Things to Remember
  • Only customer, demonstrator, and workshop order types qualify for this promotion. Online orders do not qualify.
  • Orders must be $350 or more to qualify.
  • Orders larger than $350 are not eligible for additional hostess free merchandise dollars. For example, a $700 workshop does not receive $70 in additional dollars. All orders over $350 always receive $35 in additional free hostess dollars.
  • Hostesses may use their additional $35 in free merchandise on any catalog/mini catalog products. 

Contact me today to schedule your workshop.

Online Extravaganza Starts Tomorrow!


Online Extravaganza, our annual sale to kick off the holiday shopping season, will begin Monday, November 21, 2011, and run through Wednesday, November 30, 2011. Log in to to my Debbie Martin Online Store on Monday, November 21, to take advantage of great savings, like FREE digital downloads valued at $40 when you buy My Digital Studio Express, 60 percent off select Designer Fabrics, and 30 percent off an exclusive ribbon bundle! In addition, there will be two items on sale for 24 hours only (November 21, 12:01 AM - 11:59 PM [MT])-so make sure you don't miss the first 24 hours of Online Extravaganza!

Thursday, November 17, 2011

Technique Class

Tonight is Technique Class at my home.  We will be learning two new techniques that I have been wanting to do for a long time.  The first is the Stained Mosaic Technique.

Christmas Postcard Stained Mosaic
 You can find the directions for this technique here: Stained Mosaic and the second technique can be found here: Wax Paper Resist .

Season of Joy Wax Paper Resist

 I used the Vintage Wallpaper Textured Impressions Embossing Folder for this card and Cherry Cobbler ink.  Don't you just love it?  I'll be using this technique again. 

Tuesday, November 15, 2011

Thanksgiving Place Settings

Last night Amanda and I worked on Thanksgiving Place Settings for our families.  We think they will love them, what do you think?
Thanksgiving Place Settings 
First we made these really cute turkey place card/candy holders.  I had seen the turkey at Louisville Regional on a card, but I changed his face a little.  These little candy holders will hold three Hershey Nuggets.  It is made with the larger of the Two Tags die.
Turkey place card/candy holder 
When the Idea Book and Catalog came out my ladies and I were really attracted to the Grateful Greetings on page 27 of the catalog.  I then had run across a really cute Always Thankful Trifold Card made by Alex Hobson and decided to combine both ideas into my Spice Cake Grateful Greetings.  I found directions to make the Trifold Card at SplitCoastStampers here:  Trifold Pocket Card.
Spice Cake Grateful Greetings 
I have had the Petite Pocket die for awhile and hadn't taken it out of the package and thought maybe it would hold a place setting of flatware.  I was so excited that it worked.  I stamped it with the Gently Falling stamp set and tied some Spice Cake fabric around it for a bow.
Petite Pocket Flatware Holder
Check back tomorrow for my two cards that we will be making Thursday in Technique Class.

Saturday, October 22, 2011

Stampin Llamas Holiday Blog Hop


Mocha Morning Christmas
Don't you just love this paper?  The paper on the front of this card has black flocking on it.  I thought that the swirl on it closely resembled the swirl on the Baroque Motifs stamp set, so I used that swirl with Versamark on the crumb cake on the Merry Christmas panel in the front and on the insert inside.  The Merry Christmas was from the Hand-Penned Holidays and embossed with gold.  All of these card will be included in the next Card Buffet on Wednesday.
Distressed Welcome Christmas
Lovely as a Tree stamp set is so versatile, it can be used year around.  I embossed the single pine using Wild Wasabi embossing powder and the sentiment, Welcome Christmas into your heart, from the Four the Holidays stamp set was embossed in Pewter embossing powder.  I then distressed all of the layers using our Distressing Tool in the Cutter Kit.  Then I sponged all the layers with Soft Suede ink.  I added two of our new Mini Jingle Bells with jute to the retired ribbon that I had also distressed with ink.  I added a pin from the Vintage Trinkets to the right corner of the card.  The second layer of the card is DSP from our new Christmas Lane Scrappin' Kit.
Spice Cake Day of Gratitude
Don't you just love the new Spice Cake DSP?  I used the flower from the Day of Gratitude stamp set with Versamark to watermark the card front.  I used the oak leaf from the Leaves #2 Die then embossed them with the Spider Web Embossing Folder.  The Give Thanks is from the new Hand-Penned Holidays stamp set from the Holiday Mini Catalog.  Thanks for stopping by and here is the next step on our Hop:


Friday, October 21, 2011

Beau Chateau Gift Cards and Box

Beau Chateau Gift Cards and Box
On Monday night I have a class scheduled to make a box and gift card enclosures.  The box is a Stampin' Up! Kraft Gift Box that is in the Holiday Mini Catalog(Click on the catalog to the right to see a copy).  Won't this make a nice gift for a friend, teacher or relative?  The box holds four 3x3 enclosure cards and envelopes for the cards.  My ladies will be able to pick out their own favorite DSP for this project.  Beau Chateau has been my favorite DSP in this year's catalog. 
Tomorrow I will be participating in the second Llama Blog Hop.  Stop by and see our Holiday goodies!

Recipe
Stamp:  Perfect Punches
Ink:  Versamark and Soft Suede
Paper:  Beau Chateau DSP, Whisper White, Pink Pirouette and Soft Suede Card Stock
Accessories:  Big Shot, Designer Frames Embossing Folder, Blossom Party Originals Die, Fun Flowers Bigz L Die, 3/16" Corner Punch, Extra-Lg Oval Punch, Itty Bitty Shapes Punch Pack, Mat Pack, Paper-Piercing Tool, Stamping Sponges, Melon Mambo Emboss Power, Heat Tool, Circle Fire Rhinestone Brad, Mini Square Envelopes and Kraft Gift Box

Wednesday, October 12, 2011

Swaps for Regional

On October 28th I will be attending the Stampin' Up! Regional Conference in Louisville.  While I have been under the weather this week, I have been creating card fronts to swap with other demonstrators.  I have had so much fund creating and here are my four card fronts.
French Foliage Gives Thanks

I just love the French Foliage stamp set, I was one of many demonstrators who petitioned Stampin' Up! to keep this stamp set.   The Give Thanks is one of the stamps in the stamps in the Hand-Penned Holidays stamp set from the Holiday Mini Catalog.  One of the leaves I colored using the baby wipe technique.  Then after I was finished with this card front, I took the baby wipe with reinkers and made swipes across glossy paper and came up with this card front:
Thankful Gently Falling

I then stamped the filled in leaves from the Gently Falling stamp set.  Don't you just love how vibrant the colors are?  I'll use this technique again. Isn't that turkey too cute?  This is a part of the Gift Givers stamp set out of the Holiday Mini Catalog, you can check it out on the right hand side of my blog page.  This set covers all of the major holidays: St. Patrick's, Valentines, Thanksgiving, Christmas, Halloween and Easter and even just snow.  And all of the stamps correspond with a Stampin' Up! punch!
Elegant Birthday
I have fallen in love with this piece of DSP.  It is from the Cheerful Treat Hostess Paper Set.  Isn't it just elegant?  I'll have to host another order so I can get some more of it.  The last card was the one I posted yesterday.
HSSTP Think Pink!

Tuesday, October 11, 2011

HSS Think Pink! Challenge #88

HSSTP Think Pink!
Over at Hand Stamped Sentiments this challenge is all about Thinking Pink for Breast Cancer Awareness Month.  I have been preparing card fronts for Stampin' Up Regionals in Louisville at the end of the month and this is one of them, come back tomorrow for the rest.  Doilies will always remind me of my Grannie Smith who died of cancer from second-hand smoke.  So, in her honor I chose for this card front Flirtatious Specialty DSP that has pink doilies on it.  I made a Ribbon of Hope with my ribbon as well as the Ribbon of Hope stamp.
Recipe
Stamp: Ribbon of Hope
Paper:  Pink Pirouette and Pretty in Pink Card Stock, Flirtatious Specialty DSP
Ink: Versamark
Accessories:  Melon Mambo Embossing Powder, Heat Tool, Big Shot, Designer Frames Embossing Folder, Retired Ribbon, Mat Pack, Paper-Piercing Tool, Mini Silver Brad

Monday, September 26, 2011

Soul Scrappers - SENSE-ational Summer contest # 1 - the SMELLS of SUMMER

The Sweet Smell of Honeysuckle
I belong to Soul Scrappers, a fun bunch of ladies who like to scrapbook.  They have several challenges for us each month, by the way, you don't have to be a demonstrator to join, just click on my link on the right for Soul Scrappers and tell them I invited you and you can be a part of the fun over there.
This challenge is about the SENSE-ational Summer contest # 1 - the SMELLS of SUMMER.  I'll be honest with you, living in HOT So. Illinois with all of my allergies to everything outside, including GRASS, there aren't too many smells that I really enjoy.  My journal tag says it all:  I love to walk around the corner of my house and be blown away by the sweet and bold scent of the honeysuckle growing on my back fence.  The bees, butterflies and hummingbirds enjoy it also.  If you want to see the page closer, just click on the photo.
One of the challenge requirements was that there be sewing on the page.  Last time my daughter was home, I pulled out my 25 year old sewing machine and we tried to get it working, but it is destined for the trash.  Last week I decided to check out Joanne's online sewing machines and found one that I thought might fit my needs and it was 1/3 off and free shipping.  Winner, Winner, Chicken Dinner!(LOL you can tell I watch too much Drive-Ins, Dinners and Dives).  Sewing is not a craft that I have ever enjoyed, but I have been intrigued by the sewing I have seen on cards and scrapbook pages.  So when my machine got here, it sat in the box for FOUR days until I got the taxes sent off to the IRS! YEA!  Then, I allowed myself time to actually READ the directions(something that I do rarely) for the new sewing machine.  It is supposed to do 59 different stitches, but I only see a possibility of 25.  Luella, my daughter, is coming for a visit tonight and maybe she can help me find the other 34 stitches. LOL!!!  But, I was proud of myself that I figured out how to use the leaf stitch around the boarder of my page.  I also attempted to make my own honeysuckle flower out of paper.
I placed yellow ribbon(SU retired) behind the punched Lace Ribbon Border and it really made it pop off of the page.  I used DSP(SU retired) for the title and glued it to a cereal box before cutting it out with the Timeless Type Junior Alphabet Medium Sizzlits Dies.  If you try this at home, crank the die through the big shot three times to get it to cut through this thicker material.  Just crank until you see the die go past, stop, crank the other direction, etc.  If you let it get too far through before reversing, static electricity will move your paper and ruin your image.
Recipe:
Paper: Retired SU cardstock and DSP, More Mustard, Whisper White and So Saffron Card Stock
Ink:  Old Olive
Stamp:  French Foliage
Accessories:  Big Shot, Timeless Type Junior Alphabet Medium Sizzlits Die, Lace Ribbon Border Punch, 1/2" Circle Punch, Crop-a-Dile, Stampin' Write Journal, Beautiful Wings Embosslit Die, Retired SU Ribbon, Brother Sewing Machine, Smashed Pop Bottle Cap

Friday, September 23, 2011

I Rocked the Mashup!

I can't tell you how excited I was to receive this email this morning that I was one of two "Rock Stars" over at The Friday Mashup!  Thank you ladies for the great inspiration challenge.  My class had fun making this one also.  So here is my card that won:
Autumn Splendor Shaker Card
And this is the winning badge for my blog:

Sunday, September 18, 2011

Three for Two Technique Class

Tomorrow night at technique class we will be learning not two, but three new techniques!  The first technique I read about on Gretchen Barron's Blog and it is Faux Torn Vellum Technique.  I am also entering this card:
Upsy Daisy Faux Torn Vellum Technique
 in two different challenges.  The first is the Stamping 411 challenge as follows:
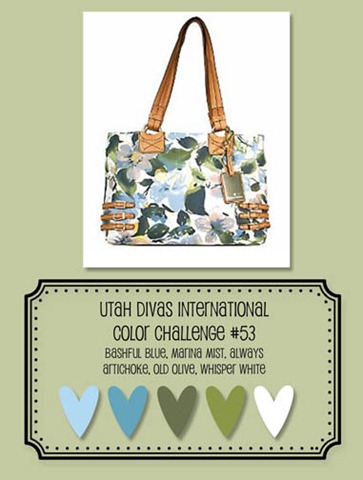
And the second is the Utah Divas Color Challenge #53 as follows:


The second card we will be making has two techniques on it.  The first was used to make the leaves on this card and it is called Watercolor Re-inker Technique and the other is a Shaker Frame. 
Autumn Splendor Shaker Card
The shaker was made using Stampin' Up!'s new Shaker Frames in the Holiday Mini Catalog, Window Sheets and Champaign Glass Glitter.  Here is a close up of the shaker frame:
I made this card for three different challenges:  First, Hand Stamped Sentiments #84 they have a Fall Theme Challenge:
The second challenge is over at Friday Mashup Challenge #24 I decided to "Mash it Up" and create an "Autumn project using shades of Yellow and Orange":
And the third, but not last challenge is over at Unscripted Sketches #124 that I used for my sketch:
I hope that my ladies enjoy making these as much as I did designing them.  So here are the recipes for the two cards:
Recipes
Upsy Daisy Faux Torn Vellum Technique
Stamp:  Upsy Daisy
Ink:  Always Artichoke, Old Olive, Marina Mist
Paper:  Bashful Blue, Old Olive and Whisper White Card Stock
Accessories:  Big Shot, Daisy #2 Die, Decorative Label Punch, Glimmer Brad, Dimensionals, Stamping Sponges, Post-it Notes


Autumn Splendor Shaker Card
Stamp:  Autumn Splendor, Day of Gratitude and Baroque Motifs
Ink:  Pumpkin Pie
Paper:  Peach Parfait, More Mustard, Cajun Craze and Shimmery White Card Stock and Spice Cake DSP
Accessories:  Daffodil Delight, More Mustard and Cajun Craze Re-inker, Versamark, Clear Embossing Powder, Heat Tool, Embossing Buddy, Aqua Painter, 1 3/8" Circle Punch, Window Sheets, Shaker Frames

Saturday, September 10, 2011

Do the Llama Hop!

I am so honored to be with a group of Stampin' Up! demonstrators who love Stampin' Up! as much as I do.  We enjoyed each others sense of humor so much that we formed our own group the Watercooler Llamas.  Please join us for our first hop, "Do the Llama Hop!".  See the link below of our blog for a list of all the participating talented ladies and join us for our first hop.
Spice Cake Lollie Wreath
Lollie wreaths have been popping up all over the internet and when Stampin' Up! brought out the Holiday Mini Catalog showing one on page 6, I had to make one for one of our classes.  After seeing so many made with Spice Cake DSP, I decided to make one also.  Don't you just love the fall colors in this paper?  Using our Simply Scored scoring tool made these lollies a breeze to make.  Using low-temp glue gun helped a lot also(I blistered two finger tips before turning it from high to low. LOL)


Don't you just love the script on the banner?  That is our new Hand-Penned Holidays stamp set, also in the new Holiday Mini Catalog.  Don't have a copy, check out the down-loadable copy on the right bar of my blog.
Recipe
Stamps:  Hand-Penned Holidays
 Paper: Pool Party, Soft Suede and More Mustard Card Stock and Spice Cake Designer Series Paper
 Ink:  Early Espresso
Accessories:  Big Shot, Simply Scored, Leaves #2 Originals Die, 1 3/4" Scallop Circle Punch, 1/2" Circle Punch,  3/4" Circle Punch, 1" Circle Punch, 1 3/8" Circle Punch, In Color Designed Printed Brad, Brights Designer Buttons, 1 1/4" Striped Grosgrain Ribbon, Spice Cake Designer Buttons, Crystal Effects

Thanks so much for stopping by.  Now off to see the other Llamas gorgeous work!