Monday, February 28, 2011

Felted Cardstock Technique Card

Wednesday night is Technique Night at class.  This is the last card technique we will be learning.  Doesn't it remind you of Nature Walk?  The other two cards will be Black Magic with a twist - I will post this card on Thursday, my ladies need some surprises and the Embedded Embossing Technique.  I'm excited and will give tutorials how we made these cards here on my blog on Thursday..so stay tuned!

Felted Cardstock Technique Card
Recipe:

Stamp:
SAB Punch Bunch (You can earn this for FREE with a $50 merchandise purchase from my 24/7 store, just click on the Stampin'Up! logo sign on the right column at the top.)
Ink:
Soft Suede
Paper:
Crumb Cake, Naturals Ivory, Very Vanilla,  Baja Breeze
Accessories:
1" Circle Medium Punch, 1/2" Circle Small Punch, Big Shot, Framed Tulips Textured Impressions Embossing Folder, Stampin' Sponge, Stampin' Dimensionals, Mystery Item(to be reveled on Thursday, check back)

Sunday, February 27, 2011

Never Ending Card

This is a card style that we will be making at our March 14th card class.  I have made this one for a special person in my life and the one we do in class will be slightly different, notice that I lined the envelope to match.  I am Casing this from Tami White and her great tutorial.

Never Ending Card Front Panel
Never Ending Card Panel 4

Never Ending Card Panel 2

Never Ending Card Panel 3
This is all one card and you keep opening it and eventually you get back to the beginning.  Who ever invented this is a genius!  I had so much fun designing it and making it.  I look forward to sharing it with you.

Recipe:
Stamps:
You're a Gem, Clearly for You
Ink:
Stazon Black, Versamark, Rose Red
Paper:
Rose Red, Sweet & Sour Specialty DSP
Accessories:
Trinket Crown, Stampin' Gold Embossing Powder, Heat Tool, Pumpkin Pie 1/4" Grosgrain Ribbon, Basic Pearls, Itty Bitty Shapes Punch Pack, Scallop Oval Extra-Large Punch, Linen Thread, Gold Brad, Stampin' Dimensionals, Stampin' Sponge

Friday, February 25, 2011

Clock Class - Beautiful Results

We had our clock class last night and here are the pictures from my very talented class:

Mari'sSpringtime Vintage, Mine behind with Love Letter, Jodi's Lap of Luxury

Paula making her Love Letters

Sabrina, Alecia and BJ with Botanical Gazette  Isn't it amazing how different they turned out using the same DSP?
Shirley's with Elegant Soiree
I had them order their DSP they wanted to use ahead of time.  Each clock was a thing of beauty and all so different.  I know some of these ladies plan on making more clocks.

Tuesday, February 22, 2011

Embedded Embossing Technique Birthday Card

Well, I had to get inspired to make some male birthday cards this week, we have three male members of the family with birthdays in the next four days.  I was inspired by Gretchen Barron and her Polka Dot Birthday, but I had to change it up and put my twist to it.  This is one of the techniques that we will be learning on 3/2 Technique Class.  Hope my brother-in-law and two nephews enjoy their cards.  These were clean and simple cards to make, I have two Girl Scout Troops that I will be making cards with in March and these would be an excellent choice for them to make.  I'll have to see...

Embedded Embossing Technique Birthday Card

Recipe:
Stamps:
Something to Celebrate ( Hostess Level 2 Occasions Mini Catalog)
Paper:
Naturals Ivory, Early Espresso, Real Red, Pumpkin Pie, Daffodil Delight
Ink:
Early Espresso
Accessories:
Big Shot, Top Note Die, Pumpkin Pie 1/4" Grosgrain Ribbon, Square Lattice Embossing Folder, 1/2, 3/4 and 1" Circle Punch

I WON BLOG CANDY!

I'm so excited!!!!!  I won blog candy over at Gilda Fellows blog: Your Fellow Stamper  and I won a FREE PASS to:
I have wanted to participate in one of these for a long time, so now I finally will and all of my ladies will benefit from it with all of the marvelous ideas that I will learn.  Stay tuned!

Sunday, February 20, 2011

Very Vintage Nature Walk CD Folder Album

Very Vintage Nature Walk CD Folder Album
I am so excited to share this album with you.  I am giving a class on this album on March 27th.  Stampin' Up! has done an excellent job on the Nature Walk stamp set and the matching DSP Botanical Gazette.  I believe that this combination is my all-time favorite since I became a demonstrator in August 2009.
When I first became a new demonstrator, Patty Bennett had a free tutorial on her blog for a CD Folder Album.  I have since modified that tutorial to fit my CD Folders and customized it to my own tastes.  Thanks to Patty for helping me along my way.  Here are more pictures:


Just love butterflies, birds and especially bees since we have eleven bee hives at our house.  Now if they would just come out with a hosta stamp I would be in seventh heaven since we have a hosta business with almost 100 varieties of hosta.
I forgot on the Watercolor Wonder Crayon Wall Art to mention that my favorite daughter, Luella (also my only daughter, LOL) taught me the techniques I used to make the wall art.  She is a very talented young lady and I am waiting for her to get moved permanently so that she can join my team...I need to start thinking of a team name...do you have any suggestions?  I would love to have you as a member of my team also, and now is the perfect time to join our Stampin' Up! team of Independent Demonstrators.  Through March 31st the New Demonstrator Starter Kit is 15% off and you also receive a Bonus Bundle worth $50 for FREE!  If you have been thinking about this, now is the time.  My team members will be trained by me and I will be happy to help you get started in this terrific career.  Stamping is my happy place and I would like to share that with you!  Click HERE to start your own business!

Recipe:

Stamps:
Nature Walk, Notes & Details, En Francais, Sanded, French Filigree
Paper:
Botanical Gazette, Naturals Ivory, Crumb Cake, Old Olive
Ink:
Soft Suede, Early Espresso, Crumb Cake, Marina Mist, Cherry Cobbler, Bashful Blue, Basic Black
Accessories:
Manila Tags, Kraft CD Folders, Stampin' Sponge, Tombow Glue, Stampin' Dimensionals, Paper Cutter

Friday, February 18, 2011

It's About Time - Clock Box

Since the 2010-2011 Stampin' Up! Idea Book and Catalog came out, I have wanted to make the clock on the front page in a class.  It's about time and I finally finished one.  We will be having this class on Thursday.  I was also inspired by a clock made by Twila at The Stamping Spot.  Each of my customers has picked out the DSP that she is interested in using on her own clock, so I will post pictures after class of all of the different clocks that are made.


Recipe:

  Stamps:
Sense of Time
Ink:
Soft Suede, Early Espresso, Watercolor Wonder Crayons-Regals, Craft Basic Black, Early Espresso Marker
Paper:
First Edition DSP, Love Letter DSP, Very Vanilla, Basic Black
Accessories:
Big Shot, Fun Flowers Bigz L Die,  Flower Folds bigz x l Die, 1 1/4" Real Red Striped Grosgrain Ribbon, Beautiful Wings Embosslits Die, Swirls Scribbles Sizzlits Die, Stampin Sponge, Glimmer Brad Basics, Aqua Painter, Stampin' Dimensionals, Multipurpose Liquid Glue, Linen Thread, Color Spritzer Tool

To order any of these items from me click on the large Stampin' Up! Logo on the right bar at the top and go to my website and click the button, Shop Now!

Thursday, February 17, 2011

Tutorial - Watercolor Wonder Crayon Wall Art Collage

I have received many requests to share instructions with you on the Watercolor Wonder Crayon Wall Art Collage piece.  We had this class on Tuesday and Wednesday nights this week and here are a couple of my customers finished projects:

BJ's Collage

Mari's Collage

And here is my new collage:

My Collage


Tutorial:
Materials - 
Fine Mist Spray Bottles - one for water and one with mixture of rubbing alcohol , ink refill and Champagne Mist Shimmer Paint
12 x 12 Basic Black Card stock
10 Manila tags
9 - 2.75" x 2.75" Whisper White Card Stock
9 - 2.5" x 2.5" Basic Black Card Stock
Stampin' Up! Stencils: Elegant Trio and Mostly Vintage
Stampin' Up! Stamps - I used a variety of Background Stamps and vintage and nature stamps and punches.
Tombow Glue
Stampin' Dimensionals
Dotto
Bone Folder
Stamping Sponges
Stampin' Up! Classic Ink & Markers
Adhesive remover
Watercolor Wonder Crayons
Paper Trimmer
Heavy cardboard strips 1"x12" and 7/8"x12" - 3 of each size.  I used the cardboard from DSP packs.

Directions:
Crumble three of the tags in your hands creating lots of creases.  Choose a watercolor wonder crayon for each tag and run the edge of your crayon across the creases. Mist with water and set aside to dry.
The next two tags I creased a pattern of lines in the tag and went over the crease with a bone folder.  Color in the patterns created by the lines with different colored crayons.  See picture of tags below for examples of these tags.
The next two tags you will use stencils on.  First tag, place the stencil on your tag, it is okay if it overlaps, just choose which part of the stencil you want to use.  Trace the inside edge of the stencil with a crayon and try to cut into the crayon with the stencil so that you leave crayon on the stencil itself as well as on the tag.  When finished, lift off the stencil and spray the tag lightly with water and set aside to dry.  Now spray the stencil on the side facing you with water and turn damp stencil over on a new tag and press the stencil onto the tag.  The left over crayon on the stencil will make a cool looking image on the tag, then set aside tag to dry.  See the bottom right corner purple example on my collage pictured above for an example of the sprayed stencil look.
The rest of the tags you will want to pick out stamps to color with your watercolor wonder crayons, mist the stamp and then stamp on the tag.  The new stamp set "Nature Walk" has a flower that worked great for this technique.
After all ten tags are finished, then spray them with the mixture of rubbing alcohol, ink refill and Shimmer Paint.  Let tags dry completely.  We had this class in two sessions so that the tags could dry over night.

Next, you will stamp your tags with background stamps and other images.  You can use a variety of ink colors and markers to color your tag images.  After you are happy with your tags, you will need to cut nine squares out of the tags measuring 2.25" x 2.25".  Sponge the edges of the squares after you have cut them.    We even popped up images with dimensionals after we were done sponging to add more interest.  If you noticed we even left some of the tag holes in some of the squares.

Tags before cutting and not all stamping done.


Building your wall collage:

Glue the black squares in the middle of the white squares.  Using dotto, place the three white 1" cardboard strips around three edges of the Basic Black 12 x 12 Card Stock.  Place your first white square in the upper left hand corner formed by the cardboard strips and glue(I used Dotto and eventually it becomes permanent).  Now using Dotto to attach one of the 7/8" strips to the right edge of the first white square you have glued down, making sure that it is straight up and down on page.  Now glue another white square in the next area created by the 7/8" strip next to the first square. Now using dotto to attach one of the 7/8" strips to the right edge of the second white square you have glued down, making sure that it is straight up and down on page. Now glue another white square in the next area created by the 7/8" strip next to the second square.  You should now have three squares lined up across the top of your page.
To create your second row, using Dotto to attach one of the 7/8" strips to the bottom edge of the first row of white squares you have glued down, making sure that it is straight across on the page. Now glue the next row of three white squares.  To create your third row, remove the 7/8" strip from between the first row and second row across and place it under the second row and then glue the last three white squares down.  Remove all of the cardboard strips and remove the spots of Dotto with Adhesive Remover.
Now glue your tag squares to the black squares and you are finished.

Hope you all have as much fun as we did making this project.  My ladies have asked to do this one again they liked it so much.  I know it looks a little dark in the pics, but is very beautiful up close.

Monday, February 7, 2011

Black Magic with a Twist

On March 2nd we will be having a technique class where we will learn three new techniques.  The first is Black Magic with a Twist.  I used this technique for a couple of challenges that I entered this week, the first was over at Soul Scrappers and the challenge was to use a stamp for the background of your page.  The color challenge was Curtain Call 68 shown here:
And here is my scrapbook page:
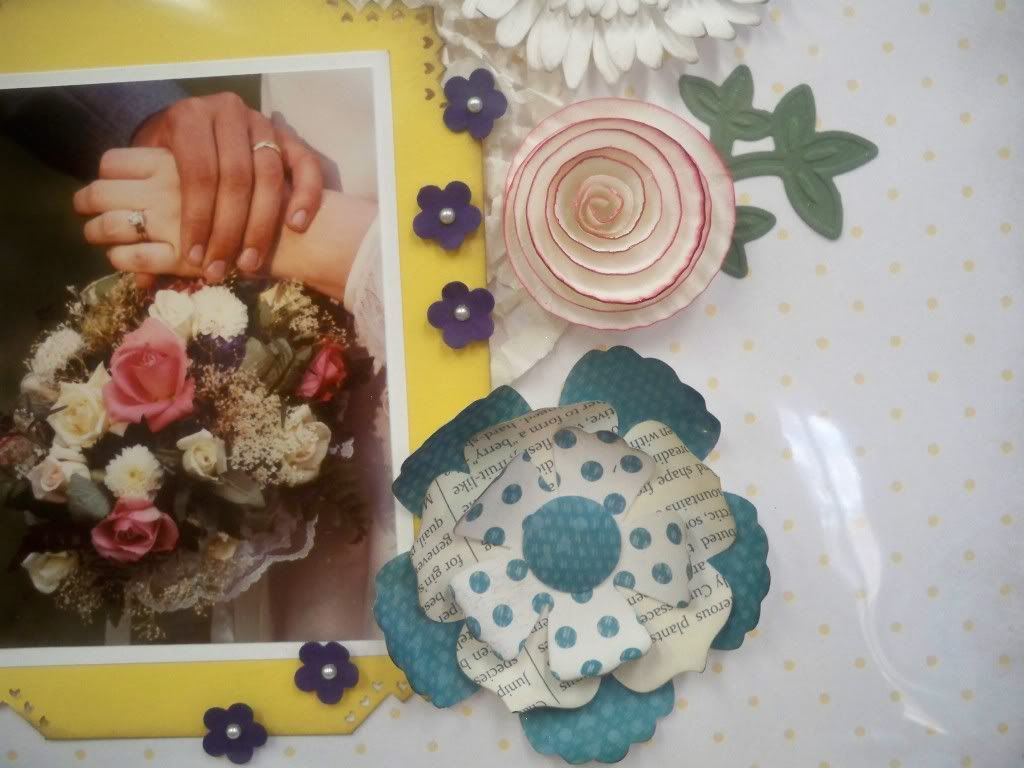
Black Magic Wedding Day


I know some of you are getting tired of seeing pictures of my wedding.  My old album had to come apart because the acid was destroying my pictures.

Recipe:

Stamps:
Baroque Motifs, Easter Blossoms, Notably Ornate

Ink:
Pretty in Pink, Certainly Celery, Wild Wasabi, Pink Pirouette, Melon Mambo, Craft White

Paper:
Pretty in Pink, Certainly Celery, Wild Wasabi, Pink Pirouette, Melon Mambo, Basic Black, Very Vanilla, Sweet and Sour DSP

Accessories:
Blossom Petals Punch, Big Shot, Tulipe Stampin' Up! Bigz Die(Retired, but on the Clearance Rack currently), Perfect Polka Dots Embossing Folder, Floral Fusion Sizzlets Die, Swirls Scribbles, Flower Daisies #2, Boho Blossoms Extra-Large Punch, Itty Bitty Shapes Punch Pack, 5-Petal Flower Extra-Large Punch, Watercolor Pencils, Uni-ball Signo Gel Pen, Sponge Daubers, Stampin Sponges, Square Fire Rhinestone Brads, Basic Pearls


Friday, February 4, 2011

Valentine Card Class

Here are the other two cards that we will be making Monday, February 7th.  I have several challenges to show you today.

Romantic Valentines Card
I really pulled out all of the glitter for this card, this one is for you, Jodie!  This one I had so much fun making, I even made the inside pretty...which is very unusual for me:


I received the background stamp, French Filigree this week in the mail and couldn't wait to get it out and use it.  The challenges for this card are, first Hand Stamped Sentiments HSSCT53 and here is their challenge:
And the design challenge is: Sketch Frenzy Friday and here is the sketch:

Recipe:

Stamps:
French Filigree, Punch Potpourri, Always, I (Heart) Hearts, Love You Much
Ink:
Basic Black, Soft Suede, Old Olive Marker, Rose Red Marker, Versamark
Paper:
Basic Black, Whisper White, Real Red, Very Vanilla, Glimmer Paper
Accessories:
 5/8" Real Red Ribbon, Heart to Heart XL Punch, Full Heart XL Punch, Big Shot, Scalloped Heart of Hearts Embosslits Die, Two-Way Glue Pen, Dazzling Diamonds, Fine Galaxy Glitter(Red), Iridescent Ice Emboss Powder, Clear Emboss Powder, Heat & Stick Powder, Clear Emboss Powder


Kiss Valentine Card
This one I have titled Kiss (Keep it Simple Stupid) because I tend to overdo it, like the Romantic Valentines Card above.  This also is for two challenges, the first: Card Scraps Color Challenge with these colors:

And the sketch challenge was from: Friday Mashup! #30 and here is the sketch:


Recipe:

Stamps:
 Punch Potpourri
Ink:
Early Espresso, Old Olive Marker, Pretty in Pink Marker 
Paper:
Confetti Cream, Early Espresso, Pink Pirouette, Glimmer Paper, Jolly Holiday
Accessories:
Full Heart XL Punch, Big Shot, Scalloped Heart of Hearts Embosslits Die, Modern Label XL Punch, Basic Pearls(colored pink with marker),  Love Impressions Rub-Ons

Thursday, February 3, 2011

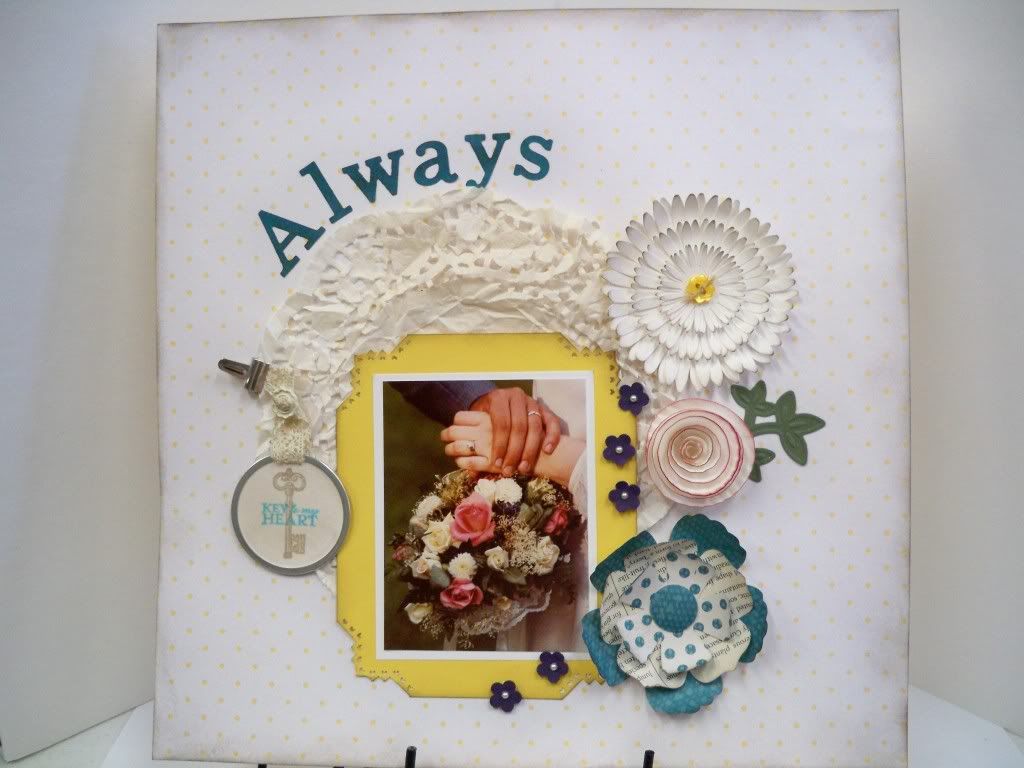
Always Scrapbook Page

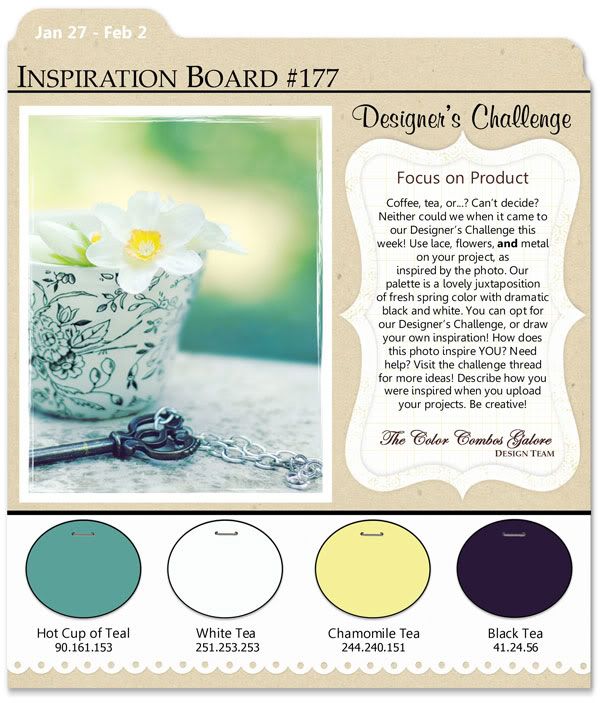
I am getting ready for Saturday's crop and decided to also do the Color Combo Challenge 177.
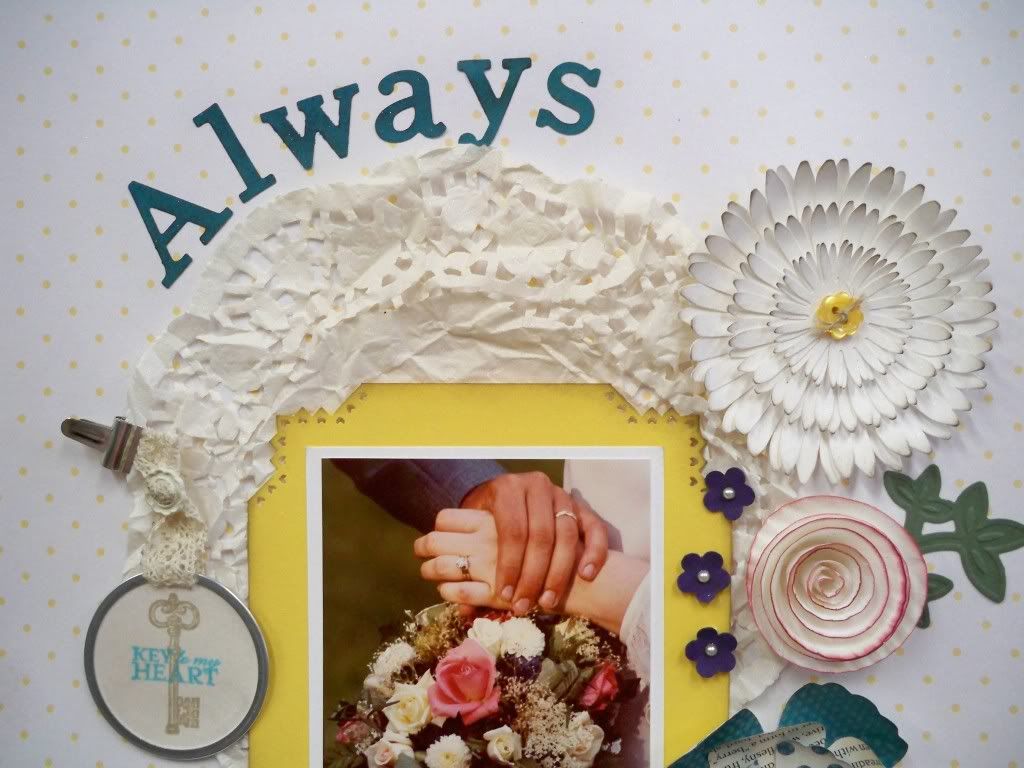
Always Scrapbook Page
This is my first time entering this challenge: 
Once again I choose one of my pictures from my wedding 30 years ago.  If you come to my crop, you will get to choose your own title and flowers that you would like to include with your subject matter.  This would make a great layout for your garden.
Recipe:

Paper:
Retired DSP, Whisper White, Daffodil Delight, Elegant Eggplant, Always Artichoke, First Edition DSP
Ink:
Soft Suede, Champagne Mist Shimmer Paint, Daffodil Delight Marker
Accessories:
Big Shot, Flower- Daisies #2 Bigz Die, Fun Flowers Bigz L Die, Table Setting Bigz xl Die, Timeless Type Junior Alphabet Medium Sizzlets Die, Sweetest Stem Embosslits Die, Basic Pearls, Clips Assortment, Victoria Crochet Trim, Ice Cream Parlor Button, Linen Thread, Pinking Hearts Corner Punch
Come join me Saturday and crop to your hearts content.

5oth Birthday for Sister

I went to visit my parents and took my younger sister, Dru, her 50th Birthday present.  I found this idea out on the net here:  Splitcoast Stampers and made this for her.

I have also sent her a campaign of cards identifying her as OLD!  You know what they say about payback...:)